Late Check-Out
The Late Check-Out screen allows users to create fee names and associate charges for late check-out at the property.
Perform the following steps to set up late check-out fees at the property.
Navigate to Settings ➜ All Settings ➜ General ➜ Property, buildings, & outlets. The Property tab displays by default.
Click the Late Check-Out tab.
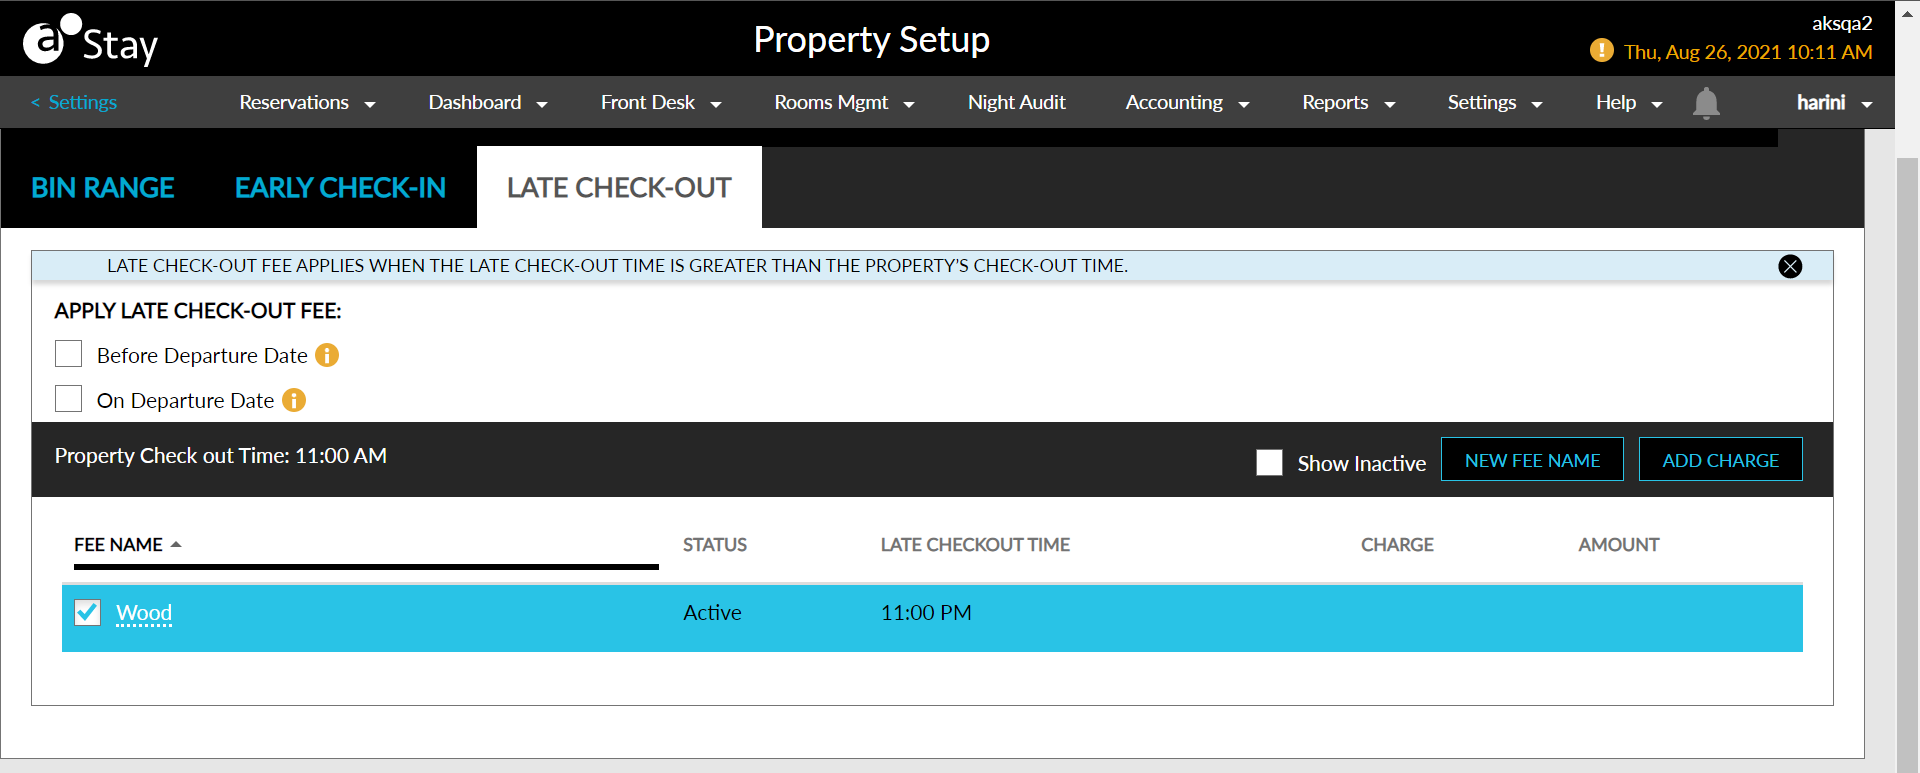
The feature setting named Late Check-Out Fee should be enabled.
Select whether the late check-out fees are applied before or on the departure date, or both, using the Apply Late Check-Out Fee label options.
Click New Fee Name in the right top corner of the grid. The New Fee Name pop-up screen displays.
Select Active to active the fee name.
Type the name of the fee in the Fee Name text box.
Enter the early check-in time and select AM or PM in the Late Check-Out Time field.
Click Save to confirm the name of the fee.
Select the fee name from the grid and click Add Charge on the right top corner of the grid.
Add the charges associated with the vehicle type using +Add next to the transaction item. Click Next to navigate to the next screen.
Confirm the charges by clicking Save.
Click the fee name in the grid to edit and save the name or inactive the status.
Click the delete icon next to each charge to remove the charge associated with the late check-out fee.